Wednesday, December 3, 2014

Dec 1st-Dec. 3rd, 2014

The last few days have been a little crazy around here, I have been out sick and had a different sub in both days.

On Monday, we watched a Bill Nye Video on Motion.  Then we completed a book assignment.  Click on the highlighted words to access the video if you were absent or want a refresher.

Textbook Assignment:  Monday, Dec 1st 2014

Learning Target:  I can describe a force and compare contact forces and non-contact forces.  

  1. Complete pg 28-29.  First answer questions #1-3 based on what you already know.  It’s okay if you are unsure of your answers!
    1. Skip questions #4, we will do vocabulary in class.
  2. Read pg 30.  Circle the Key Terms, Force and Newton, and underline the definitions of the key terms..  Complete #5 &6.  
  3. Read pg 31.  Circle the Key Terms, Contact Force, Friction, Distance Force, Gravity, and Magnetic.  Underline the definitions of the key terms.  


On Tuesday, Dec 2nd, we completed an entire assignment online using google classroom and PHET, an online simulation about balanced and unbalanced forces.  You need to login to your google classroom account to access the assignment.  These won't be graded until this weekend.

On Wednesday, Dec 3rd we took notes on forces in our science notebooks.  We completed the notes on pg 79 (a right hand page)  on page 78 we completed a force diagram foldable.  The worksheet and example is linked, if you click on the highlighted words.  Thanks for checking in and using this resources!

Force Diagram W.S.
Force Diagram W.S. Example

Sincerely,
Mrs. Grandell

Tuesday, November 18, 2014

Motion Unit-Updates

We have been busy learning all about motion using science vocabulary, math, and graphs!  Today we even pretended to be nascar drivers as we interpreted motion graphs.  Students should have been doing work in a new textbook with a blue cover on pages 4-11 so far.  The expectation is that the students are completing the reading assignments and marking the text by circling the key words and underlining the main claims.  After they read the text, they should answer the questions that are built into the text to make sure they are understanding what they are reading.


So far we have completed the following in our science notebooks for motion, if they pages have handouts they are linked below as well, just click on the title of the page!

Pg 66:  Motion "I can" Statements:  This page tells the student what they should know and be able to do by the end of the unit, in other words, what they will be graded on.  This is also a reflection and resource tool for students to keep track of their growth in learning and what they have done to learn the different ideas in the unit.

Pg 67: Motion Cover Page: Similar to the cover of a book, this is the cover to the motion unit.  The assignment is very open ended, with the following 3 rules:
                   1. It must include 3 vocabulary words from the notes on pg 68/69
                   2. It must have 3 or more pictures
                   3.  Uses color

Pg 68:  Motion Vocabulary Cards:  Motion Vocabulary cards on reference point, velocity, acceleration, and speed.  Kids wrote the definition of the word, used the word in a sentence that provides context clues, gave examples, and non-examples.  This is a vocabulary strategy known as frayer diagrams.  Finally, students drew a picture that  represented the word on the back of the vocabulary cards.  We created a simple pocket to store our cards on pg 68 in our science notebooks.

Pg 69:  Motion Cornell Notes:  Fill in the blank notes on all the important vocabulary used to discuss motion in science.

Pg 70:  Speed Lab Summary:  A summary (or clock assignment) of the lab on speed where students were asked to explain how distance, time, and speed are related.

Pg 71: Speed Lab: Handout with the directions, data table, and conclusion questions that helped students learn how to calculated speed, as well as, how speed, distance, and time are related.

Pg 72:  Speed Calculations W.S.: Practice calculating speed, distance, and time.

Pg 73: Speed Calculations Triangle: A handout that shows how to calculate speed, distance, and time.

Pg 74:  Graphing Story:  Students were asked to draw a distance vs. time graph and write a motion story that matched the graph.  We did several examples in class with the motion graphing notes.

Pg 75:  Motion Graphing Notes:  A handout of the notes we discussed on graphing motion.

Finally, you may have noticed that I have started recording individual assignments from the textbook and notebook in the gradebook instead of giving a general weekly grade.  The hope is that this more accurately represents both the quantity and the quality of the work that students are completing.  If an assignment is marked missing it may be turned in for credit.  Missing assignments are changed to 0 when I will no longer expect them for credit, which is after the unit test.

Thanks for visiting, sorry for no pictures!!

Tuesday, November 4, 2014

Science Skills Unit

Metric, Measurement, and Graphing: Oh My!!!


It's been a while since I have posted.  Here you will find a summary of the science skills unit.  There is a table of contents for what should be on each notebook.  If I it is a handout or notes, there is a link included.  Just click on the page title to access the link.  Notebooks will be graded on Thursday after we finish some lab work we have been doing.  Sorry for the formatting, still learning how to use Blogger and I couldn't figure out how to insert a table.


Left Hand Page # and Title                                        Right Hand page # and Title
 50: "I can" Statements                                                51: Vocabulary: Frayer Diagrams
                                                                                       Scale, Legend, Ind. Variable, Depend. Variable
52: Learning Log (3 entries)                                       53: Learning Log
54: Types of graphs clock assignment                        55: Types of graphs foldable
56: Steps to making a graph clock assignment           57: Steps to making a graph notes
58: Metric and Measurement Lab #1-3                       59: Metric Cornell Notes
60: Metric and Measurement Lab Summary (Thurs)  61: Metric and Measurement Lab 4-6
62: Blank                                                                     63: Metric and Measurement Lab 7-9
64: Blank                                                                     65: Metric and Measurement Foldable Review


Here are a few video tutorials for making graphs and metric conversions:


Metric Conversion Video 1
Metric Conversion Video 2

Making Graphs Video 1
Making Graphs Video 2

Saturday, October 4, 2014

Friday, Oct 3rd, 2014

Today we had another full day.  I am really pushing the kids to get a lot done in one hour.  If your child is having a hard time keeping up, please ask them if they are starting right away with the entry routine and the "Do Now".  On top of not getting started right away, I am also noticing a lot of discussion during group work/ independent work time.  I encourage a culture of collaboration and that students discuss the work with each other, so talking during this time is usually ok.  That being said, students need to keep the discussion to the topic in the class and not just socializing.  Today we learned about the respiratory system through a lecture, video, and finally a paper version of the respiratory system that we built in our notebooks on pg 41.  Today's homework is a clock assignment that explains the structure and function of the respiratory system and should be completed on page 40.  I will post examples of student work on Monday, Oct 6th.   Thanks for your hard work today!  I'm looking forward to our heart rate lab on Monday, where we will investigate how the respiratory and the circulatory system are closely connected!

Thursday, Oct 2nd 2014

Wow, what a day.  Today we finished our work with the circulatory system by labeling a diagram of the heart and reading an informational article.  We also learned an amazing active reading strategy called marking the text.  When we mark the text, students are asked to number the paragraphs, circle the key terms, and underline the important information.  What a lot of learning.  Students were assigned a clock assignment that explains how the circulatory system works.  I took pictures of many students work.  These are great examples of how the left side (student diven) and the right side (teacher driven) go together. These are also great examples of what I expect from a clock assignment.  It needs to demonstrate the learning objective for the day, in this case, that you can explain how the circulatory system works.  Many clock assignments below also demonstrate using color in a meaningful way, which has created a lot of confusion.  Remember-it should me color with purpose, not color just for fun!   Many students are also showcasing their creativity and unique learning styles.  We have artists, musicians, writers, and most importantly, LEARNING!!!  Thank you so much for your hard work, I am so impressed!


This student chose the clock assignment "Write a letter to ____________" explain what you learned.  They also used color in a meaningful way by coloring each vocab word a specific color across both the left and right hand pages.  Way to go Abbie!

 Another wonderful example, this concept map even shows how the blood flows through the circulatory system with the arteries taking blood away from the heart, moving to the capillaries, then to the veins, and back to the heart.  Great job.  On top of that, you color coded the vocabulary words too! 


Wednesday, Oct 1st, 2014

This was a very busy day, with all of our work being completed with the new chromebooks that we have in science this year!!  First students need to log on to classroom.google.com with their @isd728.org school email and read the days announcement.  Include in the announcement is a link to a google document that describes in detail how to complete the digestion lab write up in your notebook.  Next, students used socrative.com to take a check in digestive system quiz.  This is an online tool that helps both the students and I learn how much they are learning.  Today the quiz was set up to give students immediate feedback, showing them if they answered correctly, or what the correct answer should have been.  I am working on learning how to make these type of quizzes available for students to practice at any time to help them study from home.  I will let you know as soon as I figure it out!  Last students started their work on the circulatory system by creating vocabulary notecards in their notebook and filling in the definitions using a multimedia resource about the circulatory system at www.studyjams.com.  What a full day.  Below are pictures of the vocabulary cards that students completed!  Thanks to the students who let me take a picture of your work!

Tuesday, Sept 30th, 2014-Digestive System Lab

Today we experienced how the digestive system worked with the digestive system lab.  We will finish the write up for this lab on Wednesday.  If you were absent for the lab, I will offer a make up during academic edge or another alternative assignment, that is to be determined.  We had tons of fun!

Monday, September 29, 2014

Sept 29th, 2014

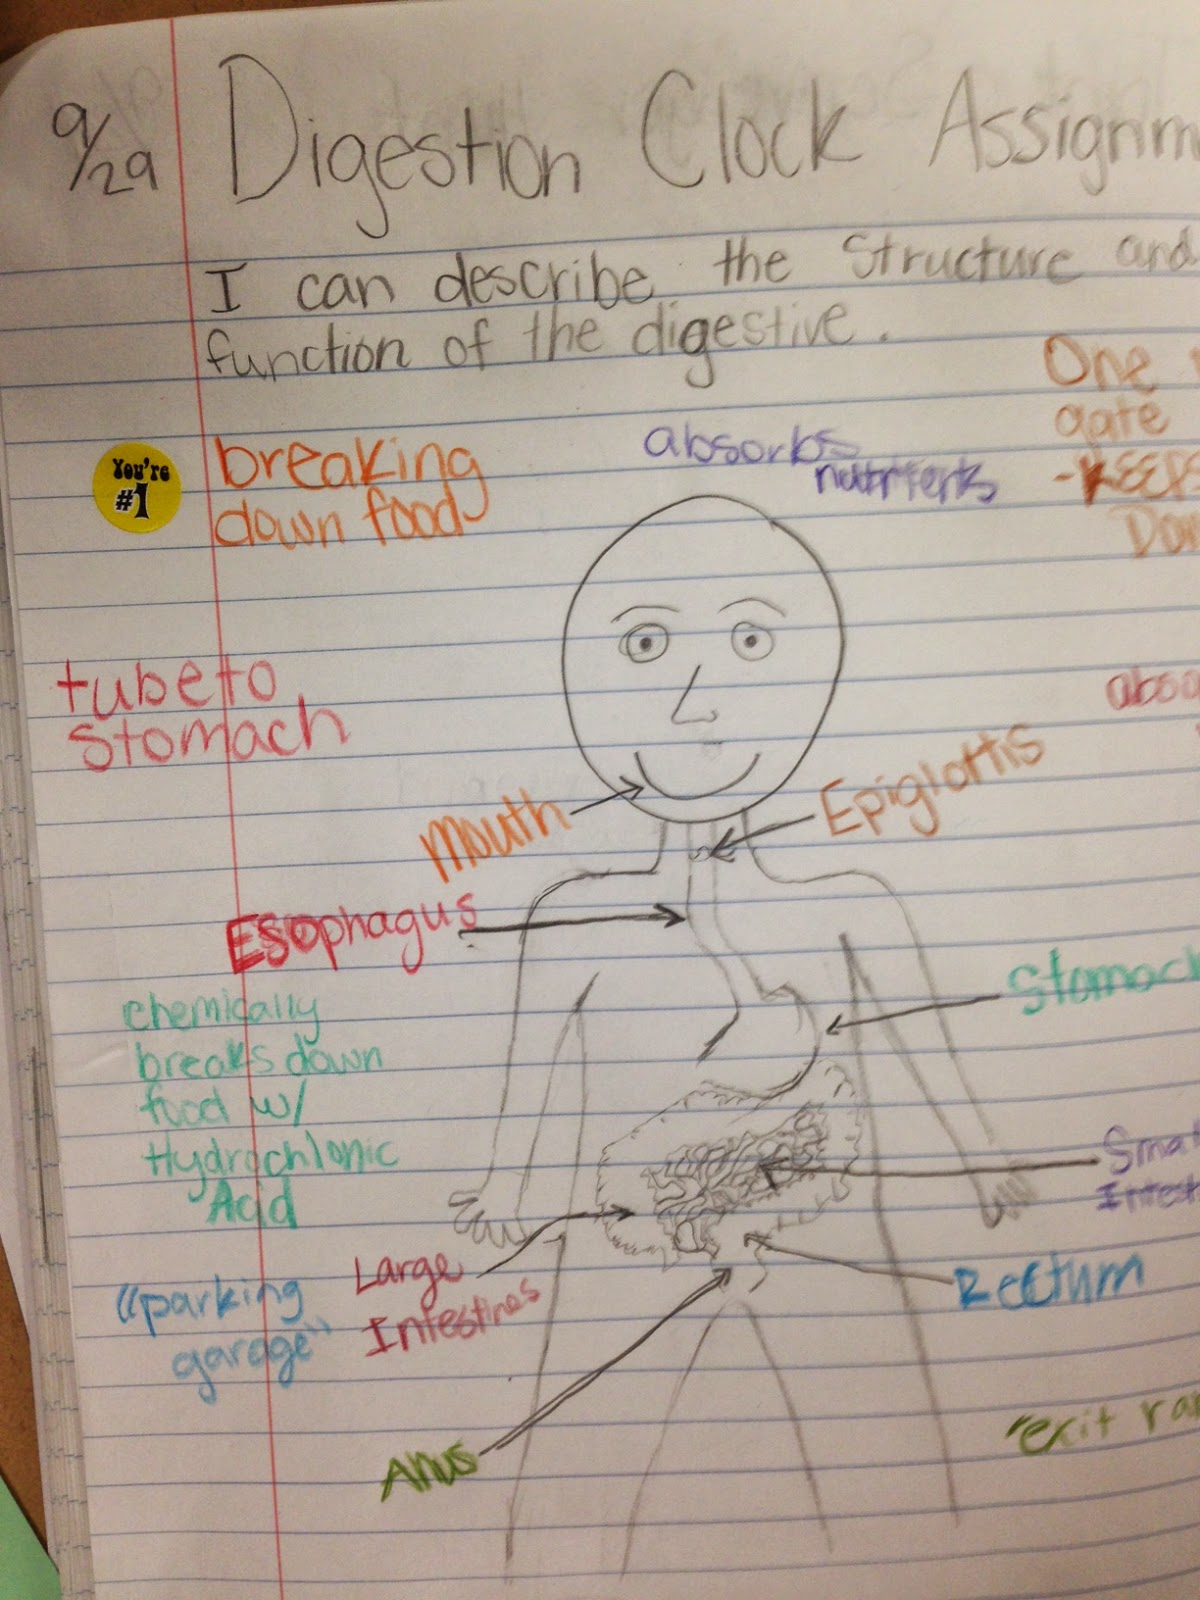
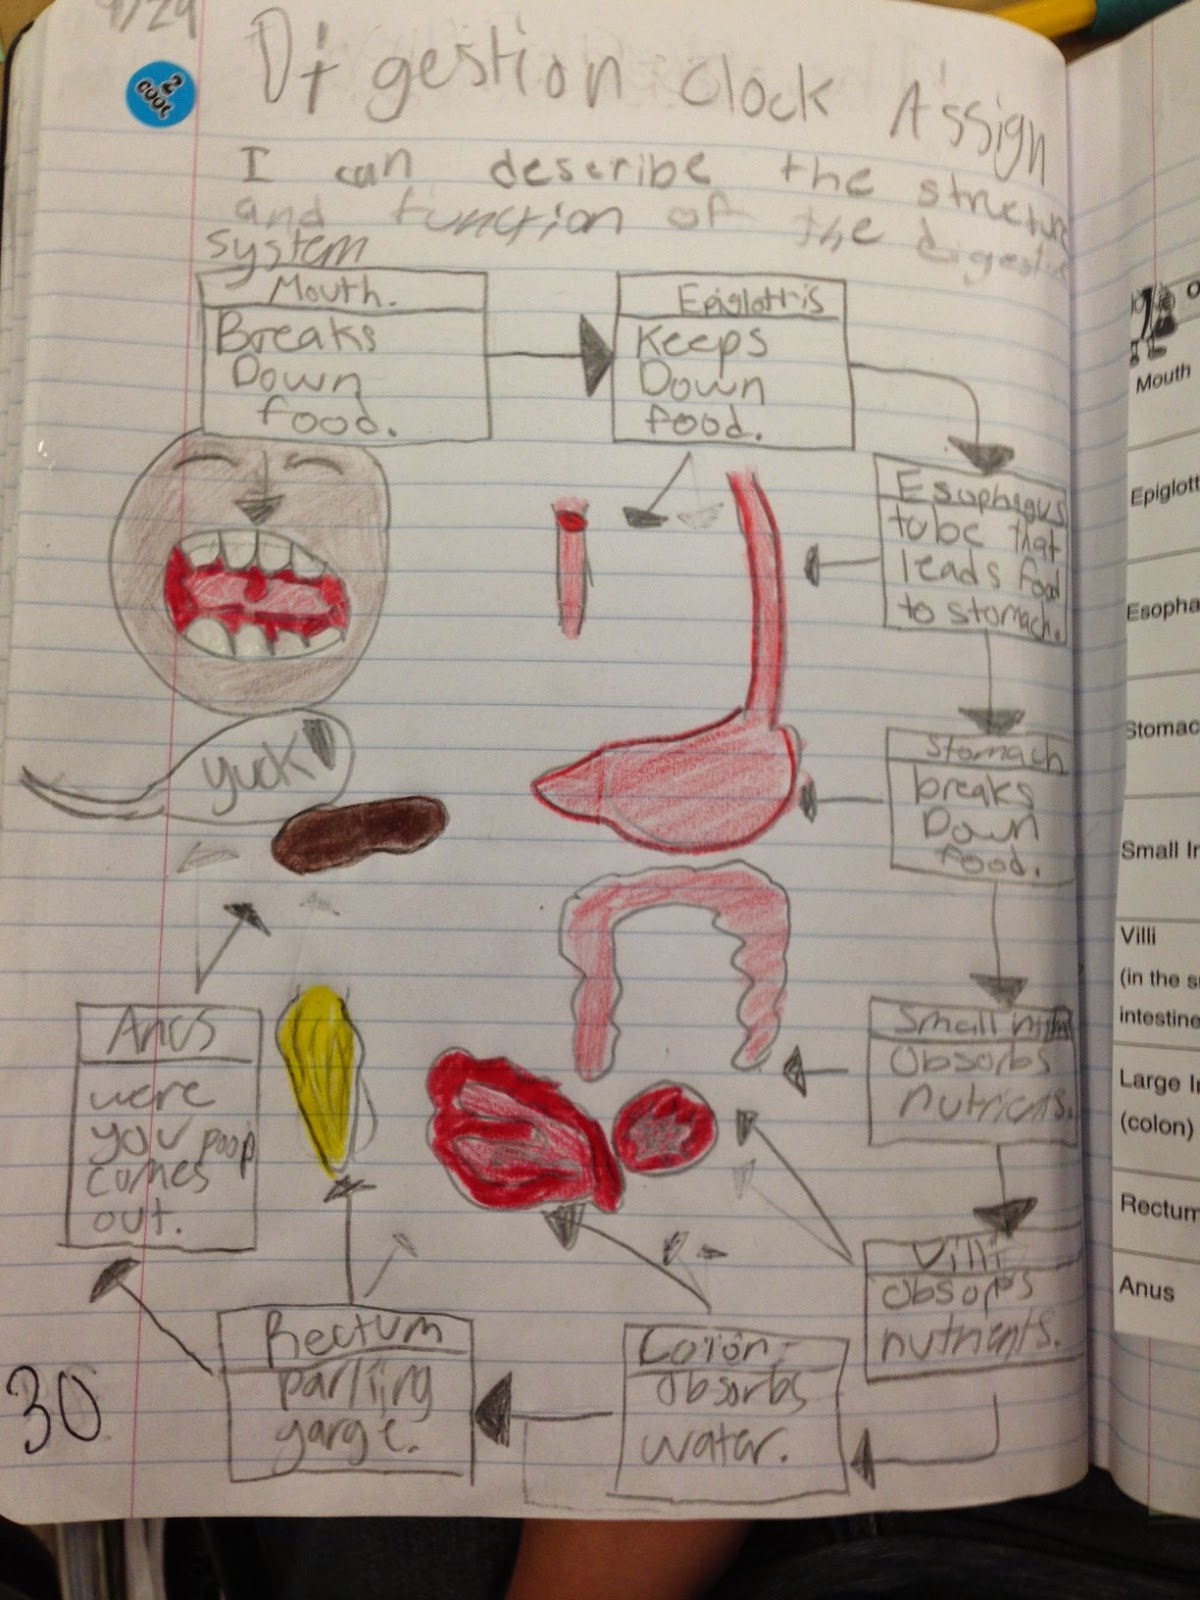
Today we had lots of information to review because there was a sub in class on Friday.  Friday we continued working with the digestive system and we played some internet games from the website www.scitunes.com, and completed a worksheet comparing the internet game to the digestive system.  Today we used textbooks, the song "It takes Guts", and in class notes to complete a worksheet reviewing the function, or job, of the major organs in the digestive system.  Students learned why their food doesn't fall out of their mouth when they do a handstand, and that our small intestine has the same surface area of a full size tennis court!  Homework is to complete a clock assignment that reviews or summarizes the structure and function of the digestive system.  You should be able to tell me the path food takes from entering to exiting the body and what happens at each stop.  For example, the mouth is the first stop, and food undergoes chemical and mechanical digestion.  In other words, the mouth breaks food down.  Second, the food goes down the esophagus, on a direct path to the stomach, and so on.  You will be tested on the mouth, esophagus, stomach, small intestine,  and large intestine.
Example of Left Hand Clock Assigments
This student completed a diagram and created an accordian notecard that describes the function of each organ.

Organ system diagram with a descriptive paragraph.
A comic strip type clock assignment on the digestive system.


A pictorial flow chart of how the digestive system works, another great clock assignment idea!

Another flowchart with diagrams, I like how this flow chart describes both the structure and function of the digestive system, which was the learning target for the day!

Here is a wonderful example of using color in a meaningful way.  The clock assignment includes a diagram and uses color to indicate which organ the writing is describing.  Very thorough clock assignment addressing the days learning target.

These are a few examples of how students might choose to complete a clock assignment, these pictures were taken from students notebook on Sept 30th, when I checked off homework.  The most important thing to consider when choosing a clock assignment is whether or not it will help you reach the days objective.  Today the objective was "I can describe the structure and function of digestive system" and all of these students clearly demonstrated that they do understand the structure and function of the digestive system.  Way to go!!

Wednesday, September 24, 2014

September 24th, 2014 - One Arm at a Time

Today we created a model of the arm with bones, joints, and muscles.  We were able to see that muscles work in pairs to move the skeleton by pulling (never pushing!) on bones.  The skeleton provides support to the muscular system.  I will add pictures soon.  Students are doing great at creating their left hand assignments, it's been so exciting to see their creativity and hard work.  The homework today was a worksheet on page 29, the most fun part is a scavenger hunt through the house to find examples of joints that work similar to the joints in our bodies.  Tomorrow we will have our first graded quiz on the organization of the human body, the skeletal system, and the muscular system.  Thanks for working with your students!

Tuesday, September 23, 2014

Sept 22nd and Sept 23rd-Skeletal System

We have been working on the skeletal system the last few days.  Yesterday (Sept 22nd) we finished our notes on pg 25 in our notebooks and we came up with a saying (mnemonic device) to help us remember the 5 types of joints.  As your student what there's was!  Today, Sept 23rd, we labeled a skeleton and highlighted the 10 bones that we need to memorize before a quiz this Thursday. We used google classroom for the second time to access some of the information that we needed.  Remember, you can access google classroom from anywhere by going to classroom.google.com and logging with your school email and password.  We also got back a quiz that did not go in the grade book.  We should use this quiz as a study guide for future quizzes and tests in this unit.  Students homework was to complete a left hand assignment on page 26 in their science notebook (see page 4 in your science notebook for details) about the 10 bones in the body that we need to memorize.  Students are doing great and I am excited to see how much they have grown already.

Update:  Here are some great student examples!!


Monday, September 22, 2014

Sept 19th, 2014-First Clock Assignment

Today students put in handouts onto pg 25 and pg 27.  We completed some of the notes on page 25, but we only got part way through.  You are not responsible for filling in the rest of the blanks on the notes, we will go over those on Monday, Sept 22nd.  Today you were assigned your first left hand clock assignment.  Before you begin there are a few things you should remember:
1: The left side is your practice of the right side.
           Since our notes were about the structure and function of bones, that is what the clock assignment            is about.
2. Clock assignments are explained on page 4-Read the whole page the 1st time through, it is very helpful, but remember you only have to do 1 of the clock assignments, or you can come up with your own idea to show me what you know.

3.  You only get what you give, if you don't put in much effort these assignments will not help you be successful.  Don't waste your time, make your work worthwhile by really thinking deep about what you are learning.

Pictures coming soon!

Friday, September 19, 2014

Sept 16th, 2014-pg 22 and 23

On Tuesday, Sept 16th we took notes on the structure and function of the muscle system.  We learned the difference between voluntary and involuntary muscles with an investigation that students are completing at home.  Also, we learned the differences between skeletal, smooth, and cardiac muscle tissues.  Make sure you do the green lab on page 22 with another person and have it completed before notebook checks on Monday, Sept 22nd. Thanks so much!!  I am also including a link to the presentation (notes) that we used this week!
https://docs.google.com/presentation/d/1QLMeAHHlXPrQ8sdpp4yJPddun0iJqiFxEylYUqV-sxE/edit?usp=sharing

pg 23-Muscle Notes
pg 22- Muscle Action Lab Handout


Don't worry-it's coming! Sept 16 & 19

Dear kids and parents,
  I am having some technically difficulty getting my notebook photos to load at school, so I have to update my blog from home.  I will get the notebook work from the 16th and 19th up on the blog sometime tonight.  Overall, the kids are doing great!!  We are still working on getting down the procedures so that we can move along more efficiently but that will come in time.  We are learning together as both the students and I are new to middle school.  I am very proud of what they have already accomplished!!  It will be helpful for students to have glue, tape, or a mini stapler in their pencil pouch that they keep in their binder to help with attaching handouts into the science notebooks.  Also having a few colored pencils or colored pens on hands helps too!  I am sorry if you didn't have these supplies on the school supply list, English and I didn't communicate about sharing the classroom supplies since I was hired over the summer.  Thanks for all you are doing to support yourself or your students learning, I appreciate you and the time you are applying towards your education!

Sincerely,
Mrs. G

Tuesday, September 16, 2014

September 15th, 2014

Today we created our first Scienstructable on pg 21.  We took notes on the 4 types of tissue using a graphic organizer.  To review the information, your homework is to color the 4 gingerbread men with examples of the tissue types, cut them out, and add them to your graphic organizer.  The order of the gingerbread doesn't matter.  The purpose is to review the 4 types of tissues function and location in the body, so make sure to think about what you are coloring while you color and don't just make it a craft project.  Only you can make it meaningful review!!

Tissue Sciencstructable, pg 21
Curriculum from Getting Nerdy

September 12th, 2014

Today we reviewed what we have learned about the levels of organization in the human body by creating a circle diagram on page 16 in our science notebooks.  Make sure to include the title "Level of organization diagram" and the date, 9/12.  Think of a way that you can use color in a meaningful way.  We also added the notebook rubric on the inside front cover and reviewed what we have done in our notebooks so far.  Monday will be the first day we grade the notebooks so make sure to get them caught up over the weekend!

Levels of Organization Circle Diagram, pg 16

September 11th, 2014

Levels of Organization in the Human Body:

Today we created a foldable in our science notebooks on pages 17 to 20 that contained the 4 levels of organization in the human body; cells, tissues, organs, and organ systems.  We used the google presentation that we created as a class yesterday to fill in the definition and draw a picture for each of the 4 levels in our foldable.  Use the pictures below to help you create your own foldable if you were absent.  Remember to use color, detail, and labels on your drawings.  Do your best work first!  Also, make sure the definitions are in your own words, not just copied from a website.  Thanks for all your hard work today!
Outside of foldable.
Fold pages 17 and 20 to the center of the notebook.  
Inside, fill in the definition and a picture
 for each of the vocabulary words.  


Sept 10th, 2014

Today was our first day using chromebooks and google classroom.  Make sure you know your school email and password:

School Email:
First five letters of your last name, first five letters of your first name, middle intial, 00@isd728.org

Password:  Your lunch pin

EX:  Peter M Johnson's email would be:     JohnsPeterM00@isd728.org

Login into google classroom by going to classroom.google.com.  This is a new tool for me too, so for now ignore due dates and assignments that are missed.  Those were created while I was practicing :) We will use this more as the year continues.

September 9th, 2014

Today we correct our human body pre-tests and attached them to page 15 in our science notebook.  You will have to cut the paper down to fit.  Make sure to date and title the page.  You can add color by highlighting the questions you got wrong or color coding the body system with the correct definition.

We also created a Human Body "I can" layered book and attached it to page 13.  This book tells you exactly what you need to know in this unit.  We will also use it like an index and keep track of where the information can be found in your notebook.  The "I can" book also tracks your quiz scores so you know when you have mastered each concept and you can truly say "I CAN"!!  The rating scale is for you to use to indicate where you are in your level of understanding from a 1(little to no understanding) to a 4 (I could teach this topic).  We will be completing this in class throughout the unit.  The unit test won't be until October, so you have plenty of time to learn all 6 of the human body systems we are studying!

Sunday, September 14, 2014

Notebooks Day 2: Right Side Vs. Left Side


Notebook Grading Rubric, inside cover
Left side and right side handouts, pg 4 and 5
Today in our notebooks we learned that the left side of the notebook will always contain assignments that are directed by the student and are often self-generated from a list of ideas found on pg 4 in your science notebook.  The right side contains the teacher generated information from lecture notes, foldables, graphic organizers, video or web notes, lab procedures, readings, and other sources of information.  This is described in detail on pages 4 and 5 of your notebook on the pink and salmon handouts.  We also began the discussion of notebook expectations and add a rubric on the inside front cover of the notebook.  Notebooks will contain all of the students daily work and will count for 20% of the students grade.  The notebooks are grade weekly via peer review and once a unit, on test days, by the teacher.  We ended  class by creating a cover page for our first unit on pg 12.  We will be studying the major organ systems of the human body.  Students cut out an outline of a human body and attached it to page 12 in their science notebooks.  Students also titled page 12, Human Body Unit, and dated the page 9/8/14.  

Human Body cover page, pg 12

Notebooks Day 1 : Author page and page numbers

The first day with notebooks we talked about how all scientists use notebooks to record their research, observations, ideas, reflections, experiments, and more.  We also talked about how notebooks will allow us to stay organized, communicate with each other, be prepared, review our learning, and keep a record of our progress.  To start our notebooks we numbered the first 50 pages, making sure that both sides of the pages are numbered and that the even number is always on a left hand page.  Then we created an author page with the students full name, class name, room number, and class period.  Finally, students get a chance to represent themselves and decorate the page however they wanted too.  We will be using these author pages to introduce ourselves to the class over the next few weeks.

Sample Author Page

Introduction

Welcome to Mrs. Grandell's Nifty Notebook Blog.  The purpose of this notebook is for students and parents to keep up with the interactive science notebook used in 6th grade science this year.  I will update posts with pictures and explanations of what goes on each page.  You will also find  other resources to help you complete  your notebook pages and the specified assignments within them here.